


1. Por qué la movilidad es tu arma secreta este verano
Movilidad para saltar la cuerda ha explotado en popularidad—y con razón. Es una de las formas más eficientes de quemar calorías, desarrollar resistencia cardiovascular y afinar la coordinación, todo mientras se adapta fácilmente a tu rutina diaria. Ya sea que busques un cuerpo definido para el verano, entrenes como un atleta o simplemente quieras un entrenamiento divertido sin equipo, saltar la cuerda cumple.
Pero esto es lo que la mayoría pasa por alto: la base de una rutina poderosa y sostenible de salto de cuerda no es solo sudor y velocidad, es la movilidad.
Descuidar la movilidad y la prevención de lesiones es una de las formas más rápidas de descarrilar tu progreso. ¿Tobillos rígidos, rodillas molestas, espinillas doloridas o hombros adoloridos? No son solo dolores al azar; son señales que tu cuerpo envía antes de que una lesión grave aparezca. Sin calentamientos adecuados, preparación para el movimiento y trabajo de recuperación, incluso las mejores rutinas pueden causar frustración, estancamientos o peor aún: tiempo fuera del entrenamiento por completo.
Esta guía es tu recurso ideal para mantenerte libre de lesiones mientras saltas la cuerda. Ya seas nuevo en movilidad o un saltador experimentado buscando más repeticiones, aprenderás exactamente cómo moverte mejor, calentar de forma más inteligente y recuperarte con más fuerza. Aquí desglosaremos un conocimiento esencial de movilidad, los errores comunes que causan lesiones y herramientas prácticas para que tu movilidad rinda al máximo todo el verano (y más allá).
¿Quieres evitar lesiones y mantenerte ágil todo el verano? Vamos a desglosarlo.

2. Las lesiones más comunes al saltar la cuerda (y qué las causa)
Aunque saltar la cuerda es de bajo impacto comparado con correr, aún genera estrés repetitivo en el cuerpo, especialmente si se hace con mala técnica, movilidad insuficiente o falta de recuperación adecuada. Desglosemos las cinco lesiones más comunes al saltar la cuerda y sus causas, para que puedas entrenar de forma más inteligente y evitar contratiempos.
1. Síndrome de estrés tibial medial (periostitis tibial)
Por qué sucede: Los saltadores suelen aterrizar con demasiada fuerza sobre superficies duras sin absorber bien el impacto. Sumado al sobreentrenamiento y calzado inadecuado, las piernas inferiores sufren mucho.
Causa biomecánica raíz: Gemelos tensos, tibial anterior débil (el músculo en la parte frontal de la espinilla) y mala movilidad del tobillo.
Signos de advertencia temprana: Dolor sordo o agudo a lo largo del interior de la espinilla, especialmente al inicio o final de los entrenamientos.
Grupo en riesgo: Principiantes, personas que saltan sobre concreto o quienes aumentan el volumen de entrenamiento demasiado rápido.
2. Fascitis plantar
3. Tendinitis de Aquiles
Por qué sucede: El uso excesivo de los músculos de la pantorrilla y el tobillo provoca inflamación del tendón de Aquiles.
Causa biomecánica raíz: Gemelos tensos, rango limitado del tobillo, aumento repentino en el volumen de saltos.
Signos de advertencia temprana: Rigidez o dolor justo encima del talón, especialmente en la mañana o después de entrenar.
Grupo en riesgo: Saltadores de alta frecuencia, atletas que regresan de períodos de descanso o quienes tienen malos hábitos de calentamiento.
4. Dolor de rodilla (Síndrome de dolor patelofemoral)
Por qué sucede: Mecánica de aterrizaje deficiente y control débil de cadera/rodilla ponen estrés excesivo en la rótula.
Causa biomecánica raíz: Glúteos débiles, cuádriceps tensos, arcos colapsados durante el salto.
Signos de advertencia temprana: Dolor alrededor o detrás de la rótula al doblar, saltar o bajar escaleras.
Grupo en riesgo: Saltadores con sobrepeso, quienes hacen dobles saltos o trabajo con cuerda con peso sin control.
5. Rigidez en el hombro
Por qué sucede: Agarrar la cuerda con demasiada fuerza y usar los hombros en lugar de las muñecas causa fatiga y rigidez.
Causa biomecánica raíz: Mala movilidad del hombro, trapecios tensos, estabilizadores escapulares débiles.
Signos de advertencia temprana: Tensión en los trapecios superiores, rango de movimiento restringido o dolor sordo después de las sesiones.
Grupo en riesgo: Principiantes que no han dominado el control de la muñeca o personas que saltan con cuerdas pesadas demasiado pronto.
Evita el dolor, no el progreso — la movilidad es tu póliza de seguro.
3. Rutina de movilidad previa a la cuerda (flujo completo de calentamiento)
Calentar adecuadamente antes de una sesión de cuerda no es opcional—es tu primera línea de defensa contra lesiones y tu arma secreta para movimientos más fluidos y explosivos. Esta rutina de 10 minutos activa grupos musculares clave, abre articulaciones tensas y prepara tu cuerpo para manejar el impacto y la coordinación que exige saltar.
Aquí tienes una rutina dinámica de cuerpo completo para el calentamiento antes de cada sesión. Solo necesitas tu cuerda, una esterilla o superficie blanda y espacio para moverte.
✅ Enfoque en la parte inferior del cuerpo (3–4 minutos)
Estos ejercicios preparan tus pies, tobillos y pantorrillas—los héroes anónimos del rendimiento con la cuerda.
🔄 Círculos de tobillo + mantenimientos en dorsiflexión
Propósito: Mejorar el rango de movimiento del tobillo para mejores aterrizajes y despeje de la cuerda.
Cómo hacerlo: Haz 10 círculos lentos por dirección y por pie. Luego arrodíllate en una media zancada y lleva la rodilla sobre los dedos del pie, manteniendo 10 segundos por pierna, 3 veces.
Consejo: Mantén el talón en el suelo para estirar correctamente.
⬆️ Elevaciones de talones + descensos excéntricos
Propósito: Fortalecer las pantorrillas y el tendón de Aquiles, reducir el riesgo de periostitis.
Cómo hacerlo: 15 elevaciones rápidas de talones, baja lentamente durante 3 segundos. Repite 2 series. Usa un escalón para mayor rango.
🧘 Pulsos de movilidad en sentadilla profunda
Propósito: Abrir caderas, tobillos y rodillas.
Cómo hacerlo: Baja en una sentadilla profunda, codos dentro de las rodillas. Haz pulsos suaves hacia arriba y abajo 15 veces.
Bono: Añade un giro levantando un brazo a la vez por encima de la cabeza.
✅ Activación de cadera (2–3 minutos)
Tus caderas controlan la mecánica de tu aterrizaje y reducen la tensión en rodillas y tobillos.
🔁 Puentes de glúteos
Propósito: Activar tus glúteos para aterrizajes controlados.
Cómo hacerlo: Acuéstate de espaldas, con los pies apoyados. Eleva las caderas, aprieta los glúteos. 15 repeticiones.
🌀 Cambios de cadera 90/90
Propósito: Mejorar la rotación interna/externa de la cadera.
Cómo hacerlo: Siéntate en el suelo, con las rodillas dobladas a 90 grados. Rota ambas rodillas de lado a lado. 10 repeticiones por lado.
👟 Balanceos de pierna de pie
Propósito: Aflojar los isquiotibiales y flexores de la cadera.
Cómo hacerlo: Balancea una pierna de adelante hacia atrás, luego de lado a lado. 10 repeticiones en cada dirección por pierna. Usa una pared para mantener el equilibrio.
✅ Movilidad de la parte superior del cuerpo / hombros (2–3 minutos)
Afloja la parte superior de tu cuerpo para que tus muñecas, brazos y hombros trabajen eficientemente sin tensión.
🔄 Círculos de brazos + Estiramiento cruzado
Propósito: Activar los hombros y abrir la parte superior de la espalda.
Cómo hacerlo: 10 círculos pequeños y grandes en cada dirección. Luego estiramiento cruzado de 15 segundos por brazo, 2 rondas.
🔁 Pasadas a través de PVC (o Pasadas a través de cuerda)
Propósito: Aumentar el rango de movimiento del hombro y preparar para la rotación.
Cómo hacerlo: Sostén tu cuerda o palo con las manos separadas. Pásalo por encima y detrás de tu cabeza y espalda. 10 repeticiones.
👉 Consejo: Consulta nuestra guía sobre las Mejores Cuerdas para Entrenamientos al Aire Libre para equipamiento que también sirve como herramienta de calentamiento.
💪 Flexiones de escápula
Propósito: Activar los estabilizadores escapulares y mejorar el control del hombro.
Cómo hacerlo: En posición de flexión, junta las escápulas y luego empuja el suelo alejándolo. Haz 15 repeticiones. Sin doblar los codos.
Calienta con intención—porque la movilidad es la base para el progreso, no solo para la prevención.
4. Técnicas de Estiramiento y Recuperación Post Salto de Cuerda
Saltar la cuerda activa todo tu cuerpo—desde las pantorrillas hasta los hombros—y aunque se siente genial terminar una sesión sudorosa, cómo terminas tu entrenamiento importa tanto como cómo lo comienzas. Enfriar con estiramientos y técnicas de recuperación adecuadas ayuda a eliminar desechos metabólicos, prevenir la rigidez y preparar tus músculos para el esfuerzo de mañana.
Así es como debes finalizar tus sesiones de salto de cuerda como un profesional.
🧘♂️ Estiramientos Estáticos (5–7 minutos)
Una vez que tu ritmo cardíaco baje, pasa a estiramientos estáticos para restaurar la longitud muscular y reducir la rigidez.
🦶 Estiramiento de Pantorrillas Contra la Pared
Propósito: Alarga los músculos de la pantorrilla y el tendón de Aquiles.
Cómo hacerlo: Coloca las manos contra la pared, da un paso atrás con un pie y presiona el talón hacia abajo. Mantén 30 segundos por pierna. Repite dos veces.
🧍 Estiramiento de Isquiotibiales de Pie
Propósito: Libera tensión en los isquiotibiales y la parte baja de la espalda.
Cómo hacerlo: Párate derecho, inclínate hacia adelante desde las caderas y alcanza tus dedos de los pies. Mantén una ligera flexión en las rodillas. Mantén 30 segundos. Repite dos veces.
🐾 Perro Boca Abajo
Propósito: Estiramiento de cuerpo completo que trabaja pantorrillas, isquiotibiales y hombros.
Cómo hacerlo: Desde una posición de plancha, empuja las caderas hacia arriba y atrás, formando una V invertida. Pedalea con los talones para aliviar las pantorrillas. Mantén 1 minuto.
🧱 Apertura de Pecho Contra la Pared
Propósito: Contrarresta la postura de hombros hacia adelante causada por saltar.
Cómo hacerlo: Coloca una mano en la pared, gira suavemente para sentir el estiramiento en el pecho y el hombro. Mantén 30 segundos de cada lado.
🪑 Estiramiento Piriforme / Figura 4
Propósito: Apunta a las caderas y glúteos para mejorar la movilidad.
Cómo hacerlo: Acuéstate boca arriba, cruza un tobillo sobre el muslo opuesto y acerca la pierna. Mantén 30 segundos por lado.
🧊 Complementos de recuperación
Lleva tu enfriamiento al siguiente nivel con estas técnicas de recuperación simples pero efectivas:
🔘 Rodillo de espuma (pantorrillas + banda iliotibial)
Descompone la fascia y mejora el flujo sanguíneo. Rueda lentamente sobre los puntos tensos durante 30–60 segundos por área.
🧊 Hielo para la periostitis tibial
Reduce la inflamación y acelera la recuperación. Aplica hielo durante 10–15 minutos después de sesiones intensas.
💆 Masaje ligero o equipo de compresión
Mejora la circulación y alivia el dolor muscular. Ideal para semanas de entrenamiento de alto volumen o días de recuperación.
💡 Enfriar adecuadamente puede reducir el DOMS (dolor muscular de aparición tardía), mejorar la movilidad y ayudarte a volver más fuerte al día siguiente.
La recuperación es parte del entrenamiento. Honra tu esfuerzo con descanso.
5. Cómo construir un plan semanal de cuerda para saltar con prioridad en la movilidad
Saber qué estirar y calentar es una cosa, pero saber cuándo y con qué frecuencia es lo que convierte el esfuerzo ocasional en resultados duraderos. Para ayudarte a mantener la constancia, evitar lesiones y progresar, aquí tienes un plan semanal práctico de cuerda para saltar que equilibra habilidad, cardio y trabajo de movilidad.
Esta rutina es amigable para principiantes, adaptable a todos los niveles y estructurada para darle a tu cuerpo la nutrición de movimiento que necesita.
🗓️ Ejemplo de flujo semanal
🔹 Lunes: Trabajo de habilidad + 10 minutos de movilidad
Enfoque: Técnica de salto, juego de pies, control de muñeca.
Movilidad: Calentamiento de cuerpo completo antes, liberación de tobillos y hombros después.
🔹 Martes: HIIT con cuerda para saltar + Movilidad de la parte inferior del cuerpo
Enfoque: Intervalos para quemar grasa y cardio.
Movilidad: Enfócate en gemelos, isquiotibiales y apertura de caderas después del entrenamiento.
🔹 Miércoles: Día de descanso + Estiramiento de cuerpo completo
Enfoque: Recuperación y reparación de tejidos.
Movilidad: 15–20 minutos de estiramientos estáticos o flujo de yoga.
🔹 Jueves: Práctica libre + Recuperación de la parte superior del cuerpo
Enfoque: Creatividad, combinaciones y ritmo.
Movilidad: Rotaciones de hombros, pases con PVC, trabajo ligero con bandas.
🔹 Viernes: Entrenamiento de fuerza + Enfoque en tobillos/caderas
Enfoque: Fuerza en la parte inferior o total del cuerpo con sentadillas, zancadas y core.
Movilidad: Pulsos en sentadilla profunda, puentes de glúteos, ejercicios de movilidad de cadera.
🔹 Sábado: Sesión de resistencia + Flujo completo de movilidad
Enfoque: Sesiones más largas de cuerda para saltar o saltos a ritmo constante.
Movilidad: Incluye tanto calentamiento como foam rolling post-sesión + estiramientos estáticos.
🔹 Domingo: Descanso activo + Foam rolling
Enfoque: Actividad ligera—caminar, bailar o saltar la cuerda lentamente.
Recuperación: Dedica 10–15 minutos a rodar con foam las áreas tensas y a respirar profundamente.
📈 Consejos de progresión
- Comienza pequeño: No intentes hacerlo todo de una vez. Empieza con 2–3 sesiones dedicadas a la movilidad por semana y ve aumentando.
- Intensidad del ciclo: Usa días más duros (HIIT, fuerza) para combinar con trabajo de recuperación enfocado.
- Escucha a tu cuerpo: Si te sientes agotado o adolorido, cambia la intensidad por movilidad.
- Registra patrones de rigidez: Toma notas de dónde te sientes más rígido y adapta tu rutina en consecuencia.
Al integrar la movilidad en tu ritmo semanal—no solo como un pensamiento secundario—te sentirás más ligero, te moverás mejor y reducirás dramáticamente el riesgo de lesiones. Tu cuerpo no está hecho solo para empujar—está hecho para recuperarse, recalibrarse y volver más fuerte.
6. Herramientas que ayudan a prevenir lesiones al saltar la cuerda
La movilidad y la técnica son clave, pero el equipo que uses puede hacer o deshacer tu éxito a largo plazo con la cuerda. Invertir en el equipo correcto no solo mejora el rendimiento, sino que también ayuda activamente a prevenir lesiones al apoyar tus articulaciones, mejorar la forma y absorber el impacto.
Aquí están las herramientas esenciales que todo saltador inteligente debe tener en su equipo:
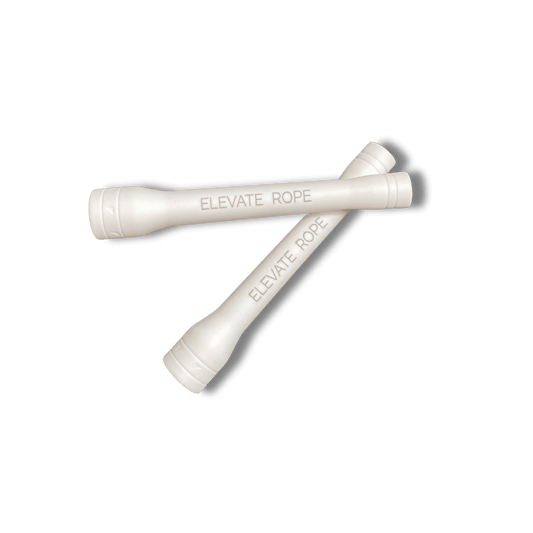
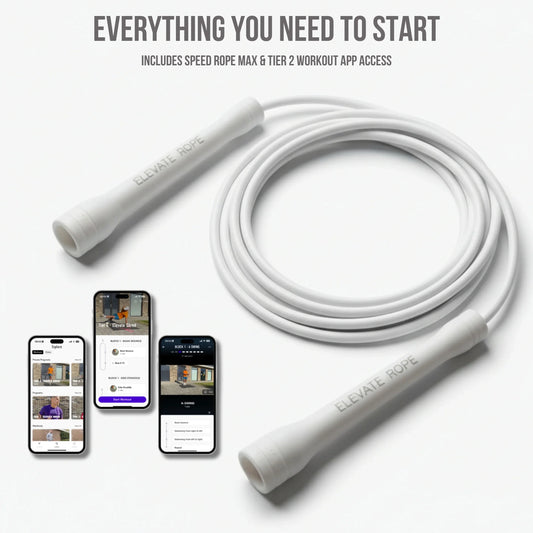
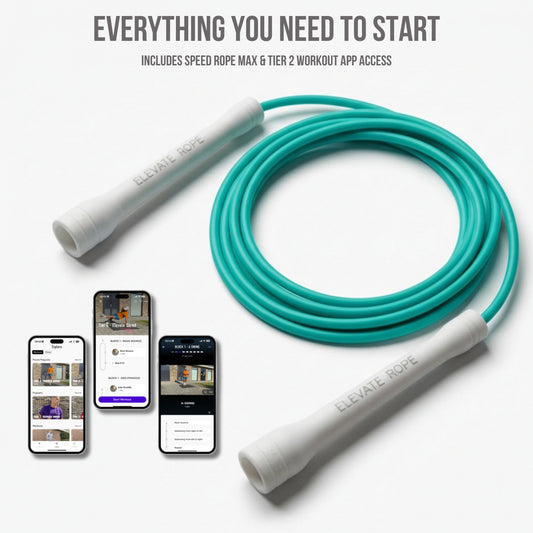
🪢 Cuerda para saltar adecuada
No todas las cuerdas son iguales. Una cuerda mal dimensionada o de baja calidad puede forzar una mala forma y aumentar la tensión en tus hombros y muñecas.
Qué usar:
- Cuerdas ajustables para adaptarse a tu altura
- Cuerdas con peso para desarrollar fuerza y reducir la velocidad para mayor control
- Cuerdas con cuentas para ritmo, retroalimentación y estilo libre
👉 Prueba la Elevate Beaded Rope para durabilidad, rotación suave y mejores señales de sincronización—ideal tanto para principiantes como para saltadores avanzados.
👟 Calzado de soporte
Saltar descalzo o con zapatillas desgastadas pone estrés innecesario en tus arcos, tobillos y rodillas.
Qué debes observar:
- Suelas amortiguadoras
- Estabilidad lateral
- Diseño ligero y transpirable
Consejo profesional: Los zapatos para entrenamiento cruzado o para canchas interiores funcionan mejor que los zapatos para correr para saltar la cuerda.
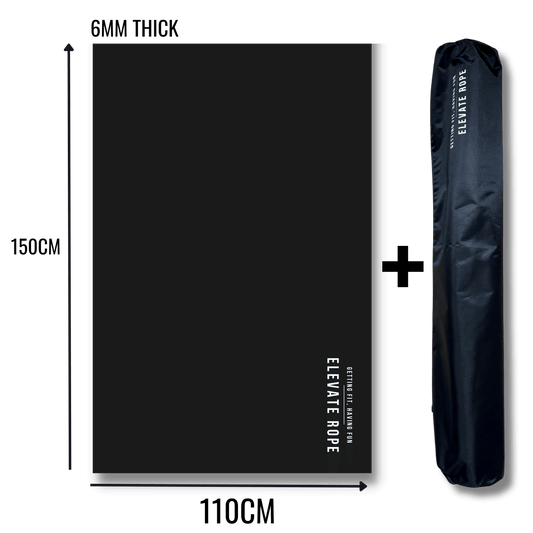
🧘 Tapete para saltar la cuerda
La superficie sobre la que saltas importa. Un suelo duro como el concreto amplifica el impacto en las articulaciones.
Beneficios de usar una colchoneta:
- Reduce la tensión en rodillas, espinillas y tobillos
- Mejora el rebote y el agarre
- Extiende la vida de tu cuerda
👉 La Elevate Jump Rope Mat está diseñada para absorber el impacto y mantenerse en su lugar durante sesiones rápidas.
🦵 Mangas de compresión y rodilleras
Para atletas que regresan de una lesión o con articulaciones sensibles, la compresión ligera puede mejorar la circulación y estabilidad durante el entrenamiento.
Cuándo usar:
- Recuperándose de periostitis o dolor de rodilla
- Durante semanas de saltos de alto volumen
- Para soporte adicional en dobles saltos o sesiones con peso
Tener el equipo adecuado no reemplaza una buena forma, pero puede darle a tu cuerpo el soporte que necesita para prosperar.
7. Mentalidad, Mecánica y Forma: El trío definitivo para la prevención de lesiones
Cuando la mayoría piensa en prevención de lesiones, imagina rutinas tediosas de estiramiento o que le digan “reduce la velocidad”. Pero aquí está la verdad: la prevención de lesiones es desarrollo de habilidades. Es la base para dominar tu arte, desbloquear trucos más difíciles y progresar más rápido, de forma segura.
🧠 Mentalidad: De tarea a oportunidad
La movilidad, los calentamientos y los días de descanso no son extras, son parte del proceso. Cambiar tu mentalidad de “tengo que” a “esto me mejora” convierte la prevención de lesiones en preparación para el rendimiento. Los campeones no omiten lo básico, lo perfeccionan.
🔁 Mecánica: Errores comunes de forma que conducen a lesiones
❌ Saltar demasiado alto
Desperdicia energía y aumenta el impacto. Apunta a pequeños saltos eficientes de una o dos pulgadas del suelo.
❌ Aterrizar con los pies planos
Esto daña tus articulaciones. Aterriza suavemente sobre las puntas de tus pies y deja que tus pantorrillas absorban el impacto.
❌ Uso excesivo de los brazos en lugar de las muñecas
Usar los brazos para mover la cuerda fatiga los hombros y altera el ritmo. Mantén los codos cerca y deja que las muñecas hagan el trabajo.
❌ Sin días de descanso
Forzar el dolor o saltarte la recuperación te prepara para lesiones, no para avances. Incorpora el descanso en tu rutina como un profesional.
🧘♂️ Enfoque en la forma: Mantente presente para mantenerte seguro
¿Quieres evitar lesiones? Aprende a escuchar a tu cuerpo y mantenerte en sintonía con tu técnica. Aquí te mostramos cómo:
- Salta frente a un espejo: Observa tu postura, posición de los pies y altura del salto en tiempo real.
- Graba tu forma semanalmente: Pequeños ajustes hacen una gran diferencia. Usa cámara lenta para analizar tu sincronización y alineación.
- Respira intencionalmente: El control de la respiración apoya el ritmo y te ayuda a entrar en un estado de flujo que mejora la forma y el enfoque.
Cuanto más intencional seas con tu movimiento, más poderoso (y sin dolor) será tu recorrido con la cuerda.
Solución de problemas: qué hacer si ya estás lesionado
Incluso con las mejores rutinas, pueden ocurrir lesiones—y cuando suceden, cómo respondes determina qué tan rápido (y seguro) te recuperas. La clave es saber cuándo descansar, cuándo modificar y cuándo buscar ayuda.
⏸️ Cuándo descansar vs. cuándo modificar
Si estás lidiando con dolor agudo y persistente, especialmente en articulaciones o tendones (como el Aquiles o las rodillas), el descanso es innegociable. Continuar saltando sobre una zona inflamada o lesionada puede convertir un problema menor en uno a largo plazo.
Sin embargo, si tu molestia es leve y muscular—como dolor, rigidez o tensión—puedes modificar tu entrenamiento en lugar de saltártelo por completo.
🧍♀️ Alternativas de bajo impacto para mantenerte en movimiento
¿No quieres perder el impulso mientras te recuperas? Prueba estas variaciones más suaves de salto con cuerda:
- Balanceos laterales: Mantén el ritmo sin saltar. Excelente para trabajar los hombros y el control de las muñecas.
- Cuerda fantasma: Realiza los movimientos sin la cuerda—los mismos beneficios cardiovasculares, sin impacto.
- Salto en sombra: Toques ligeros con los pies o saltos suaves sobre una colchoneta sin saltos completos. Ideal para la recuperación de las espinillas o la sensibilidad en los pies.
Estos te permiten mantenerte activo, mejorar la técnica y recuperar la confianza mientras proteges tu lesión.
🩺 Cuándo buscar ayuda profesional
Si el dolor dura más de unos días, empeora con la actividad o limita tu movilidad, consulta a un fisioterapeuta o médico deportivo. Obtener un diagnóstico adecuado temprano puede prevenir daños a largo plazo y ayudarte a volver más fuerte.
👉 Para más consejos sobre ambientes inteligentes y seguros para entrenar, consulta nuestra guía sobre Cómo saltar la cuerda de forma segura al aire libre.
Tu cuerpo es tu mayor activo—trátalo como tal.
Conclusión: Mantente ligero, mantente fuerte
La movilidad no solo se trata de evitar lesiones—se trata de desbloquear tu máximo potencial con cada salto. Cuando tus articulaciones se mueven libremente y tus músculos están preparados, no solo te sientes mejor—rindes mejor.
Esta guía no está hecha para leerse una vez y olvidarse. Es tu referencia continua para un entrenamiento más inteligente y seguro que te ayuda a mantener la constancia y confianza, ya sea que saltes en tu garaje, en el gimnasio o al aire libre en un día soleado.
Así que sé proactivo. Haz de la movilidad una parte innegociable de tu rutina. Tu yo futuro—y tu cuerpo—te lo agradecerán.
¿Listo para saltar de manera más inteligente? Toma tu Elevate Rope y pon esta guía en acción.
📌 No olvides revisar:
- Plan de entrenamiento con cuerda para saltar para principiantes
- Cómo saltar la cuerda de forma segura al aire libre
- Elevate Beaded Rope
- Alfombrilla para saltar la cuerda
- 🎥 YouTube: Rutina de calentamiento con cuerda para saltar de Geraldo Alken
✅ Notas SEO internas:
- Agrega esquema FAQ para las preguntas principales
- Usa una estructura de encabezados adecuada (H2/H3)
- Incluye texto alternativo con la palabra clave: movilidad con cuerda para saltar
- Formato para legibilidad móvil con párrafos cortos y viñetas